Response Submittedrespond Again Shared on Feb 26 at 03 56 Pm
Setting upwardly an Autoresponder Email
May four, 2022
If y'all desire an instant, pre-written reply, or you want the submitters to get a copy of the data they have submitted on your grade, so you will need to gear up an Autoresponder Email, so permit's get started!
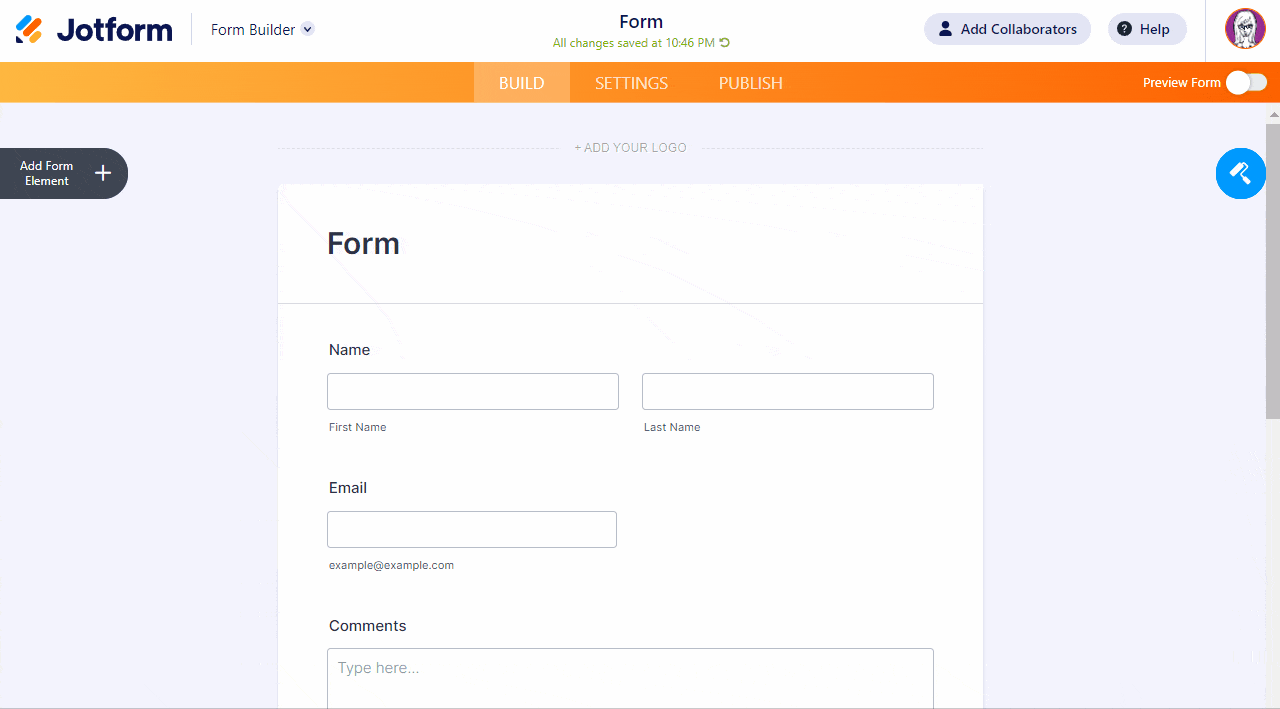
- Click Settings at the acme of the Form Builder.
- Side by side, click Emails on the left panel.
- Click the Add an email button.
- So, select Autoresponder Email.
Autoresponder E-mail Settings
Each section is separated by tabs.
Allows you lot to gear up up the email template.
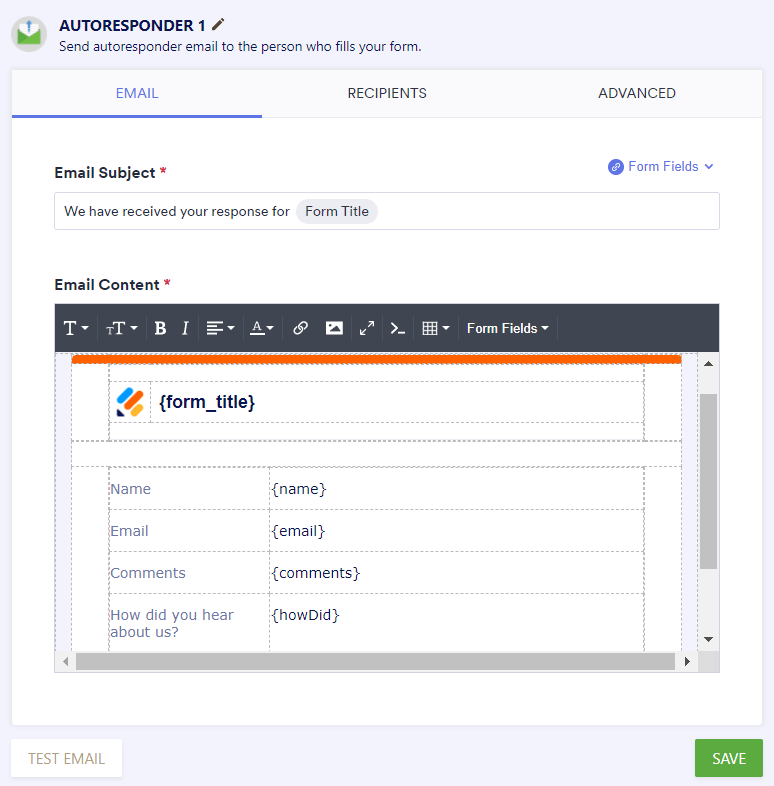
- Autoresponder ane – this is the default proper noun of your email template. Y'all can click the pencil icon and edit the name of the Autoresponder email.
- E-mail Subject – you lot can input text here that will be used as the email'south subject line. If you want to add a form field value to it, simply click on the Grade Fields link institute in this section and it will requite you the list of form fields.
- Email Content – this is the main trunk of the email template, you can edit, format, or style it as you similar. Here, yous can run into the Form Fields tool, it'll give you the correct field tag specific to its related form field.
Recipients
This allows you to gear up the sender proper name, reply-to e-mail accost, and recipient email for where you desire to send the Autoresponder.
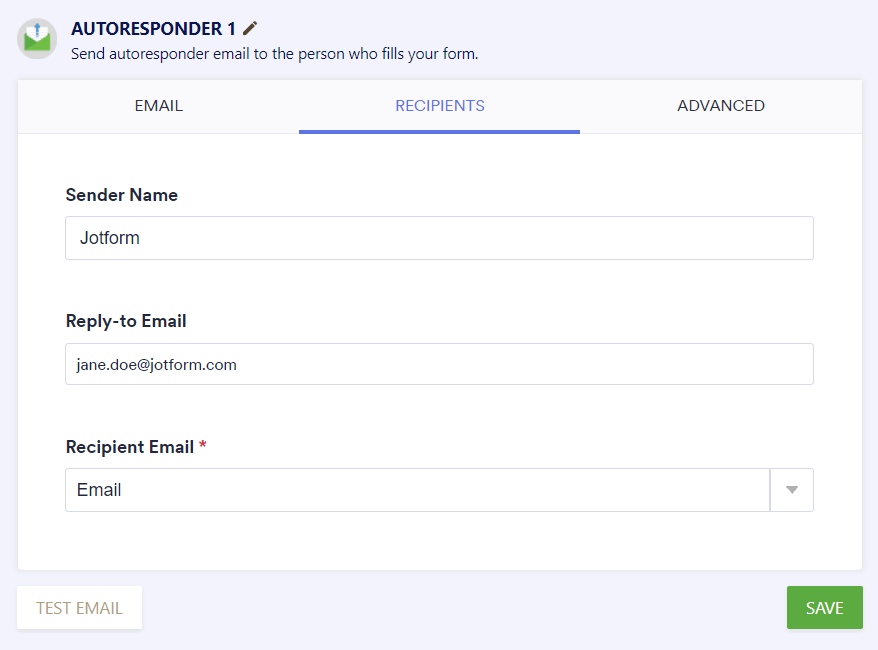
- Sender Proper noun – this can be your name or your company's name.
- Reply-to Email – should be you, your colleagues, or the client's email accost. This is the address where the reply of the class fillers will be sent in case they respond to the Autoresponder e-mail they receive.
- Recipient Electronic mail – this should be the course filler's email address. It is mapped to one of your form's Electronic mail elements by default.
Advanced
At that place are optional features that yous tin can use here, though none of them are required.
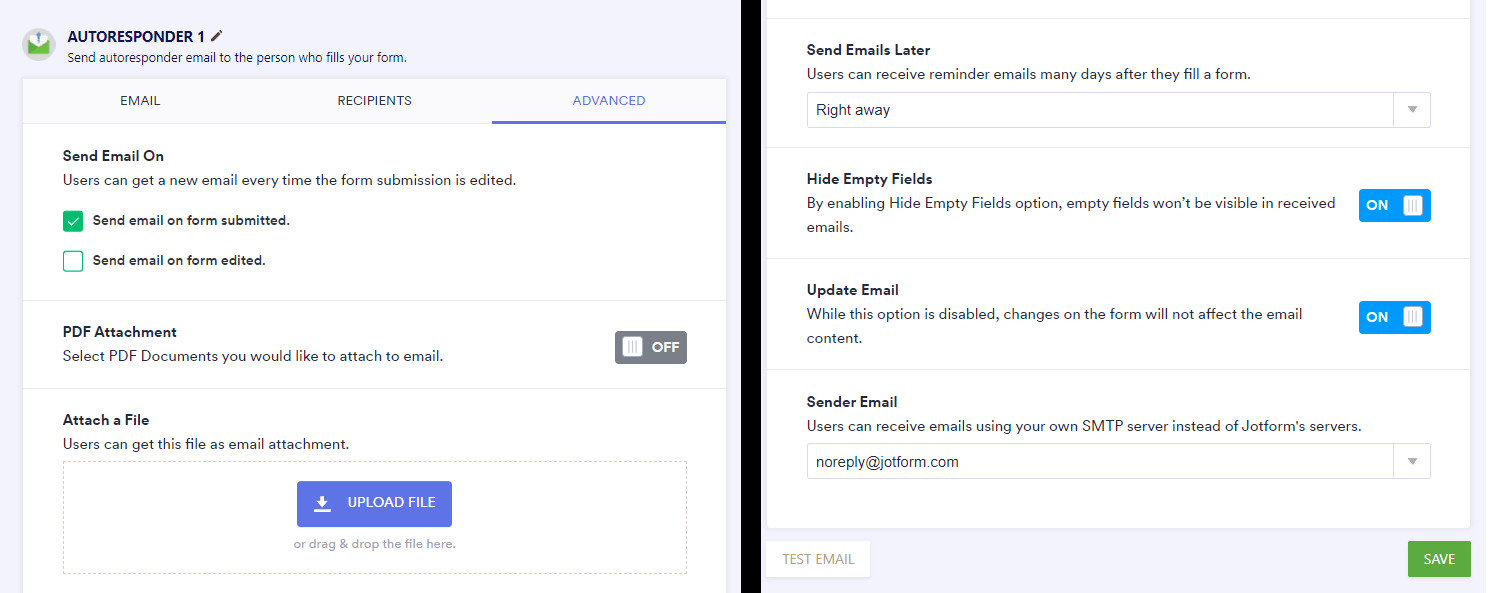
- Transport Electronic mail On – triggers for sending the Autoresponder email.
- PDF Attachment – select PDF Documents you would like to adhere to the email.
- Attach a File – you can attach a file that your customers volition receive via email.
- Send Emails Later – users can receive reminder emails many days after they fill out a form.
- Hibernate Empty Fields – by enabling this pick, empty fields won't be visible in received emails.
- Update Email – while this option is disabled, changes on the form will not impact the electronic mail content.
- Sender Email – users tin can receive emails using your SMTP server instead of Jotform's servers.
Don't forget to click the Save button and make sure that all the changes in your Autoresponder were applied.
Notes
If you'd like to see how your Autoresponder looks, you tin test your grade Autoresponder e-mail by clicking the Exam Email button. You should receive the exam email at your account's registered email address. You tin also test the class by filling it out to submit actual information using a valid examination electronic mail.
Additionally, at that place is too the hazard that you may have more than ane email address that yous wish to use in your Autoresponder to exist listed with the notification beingness sent to multiple recipients.
If you desire to utilise your email accost every bit the Sender Email, that is now possible with Jotform. There are two methods that yous tin can use:
- Add together a Custom Sender Address to the Email Warning
- Ready an SMTP for the Form
Note
If y'all're looking for a way to prepare a text-only email, this is not possible anymore. The new magician will permit you lot to only change the HTML email, text-only emails are no longer used as mobile devices are becoming more common and all can open HTML-based emails without issues.
Comments and suggestions are welcome beneath. If you have a question, mail service it in our Support Forum so we can assist you.
Thank you for helping improve Jotform's user guides. 🎉
Source: https://www.jotform.com/help/26-setting-up-an-autoresponder-email/